
Running a workflow
Workflows are analyses that are intended to be executed (one or more times) with different user-provided input Datasets. Workflow can be reused over and over, not only reducing tedious work, but enhancing reproducibility by applying the same exact methods to all of your data.
Running a workflow is easy with Galaksio. At the "Workflows" panel, find the workflow that you want to run and click on the option "Run workflow". This option will open a more detailed view of the workflow. The first step in the process displays an overview of the workflow (Figure 1). Using the buttons located at the bottom we can easily configure our workflow execution.
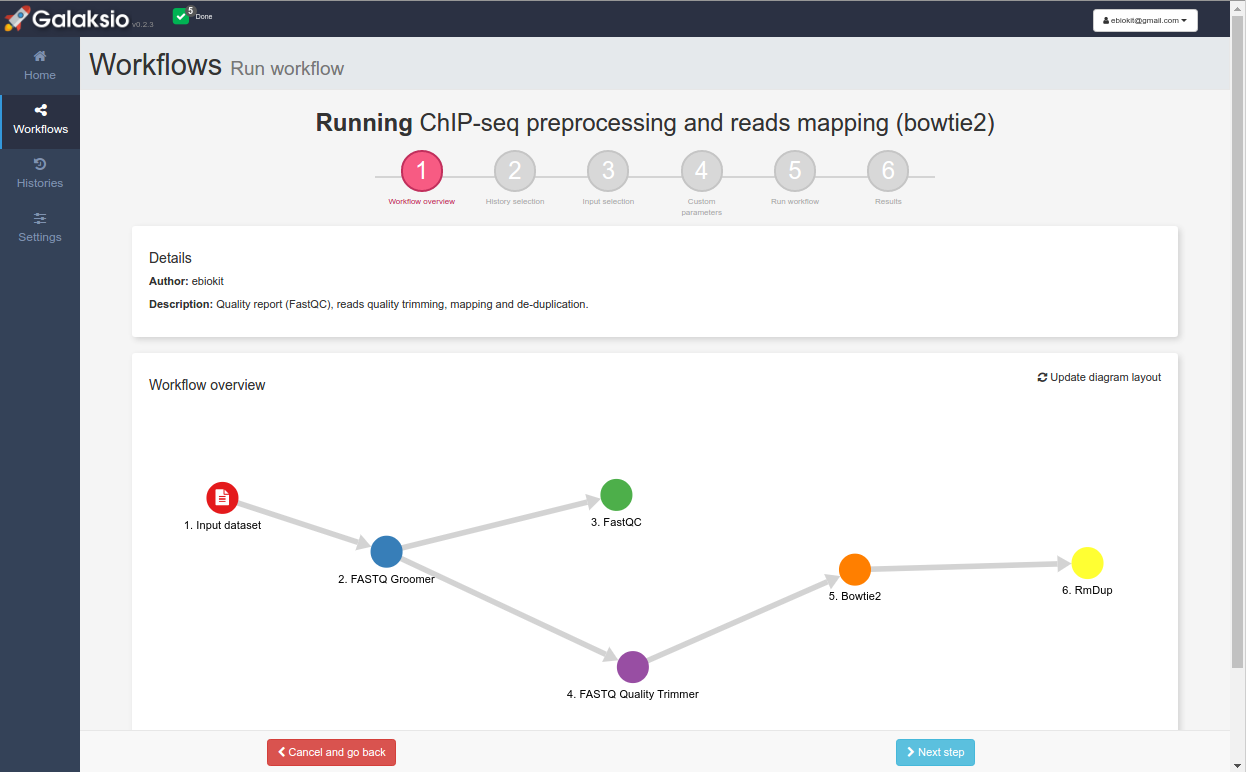
Figure 1. Overview for the selected workflow.
At the second step in the process we can choose the history that contains the files that will be used in the workflow. Additionally, we can upload new datasets or create new dataset collections (Figure 2).
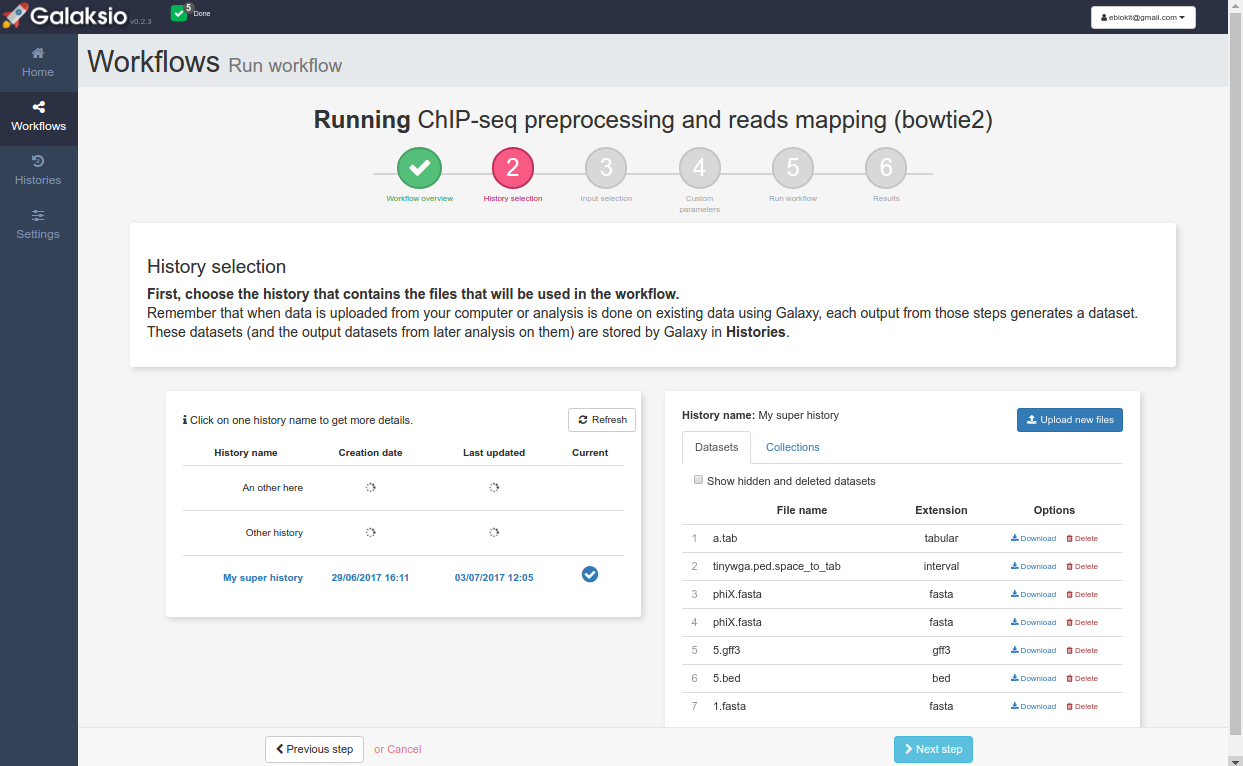
Figure 2. In step 2, we can optionally choose the history that we want to use for the execution.
The third step is probably the most important step in the process. At this step we need to choose the input datasets for the workflow (Figure 3). Input datasets (or dataset collections) can be selected from the current history. Make sure to select the correct files!
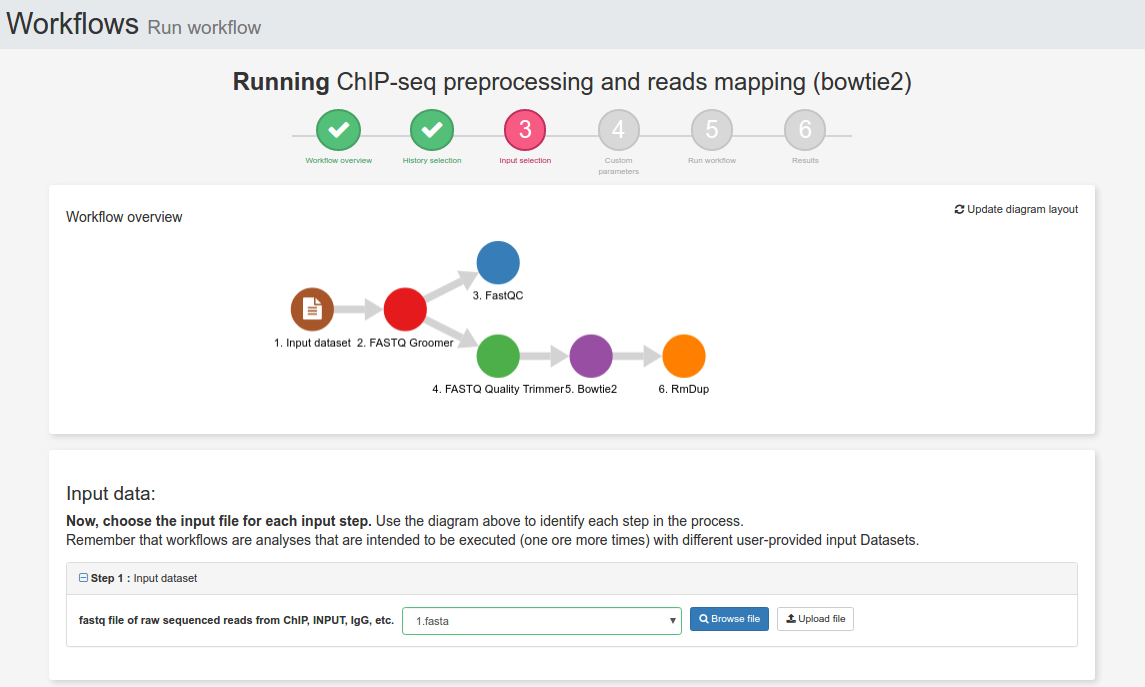
Figure 3. Choosing the input datasets for our example workflow.
After selecting the input datasets, we can go to the next step. Step 4 displays all the steps that constitute the workflow. Due to the workflow was designed by an skilled user, we can assume that the default configuration for each step is valid for our analysis. Nevertheless, it is possible to customize the parameters for each step in the process. For example, figure 4 displays a custom configuration for the tool "Bowtie2".
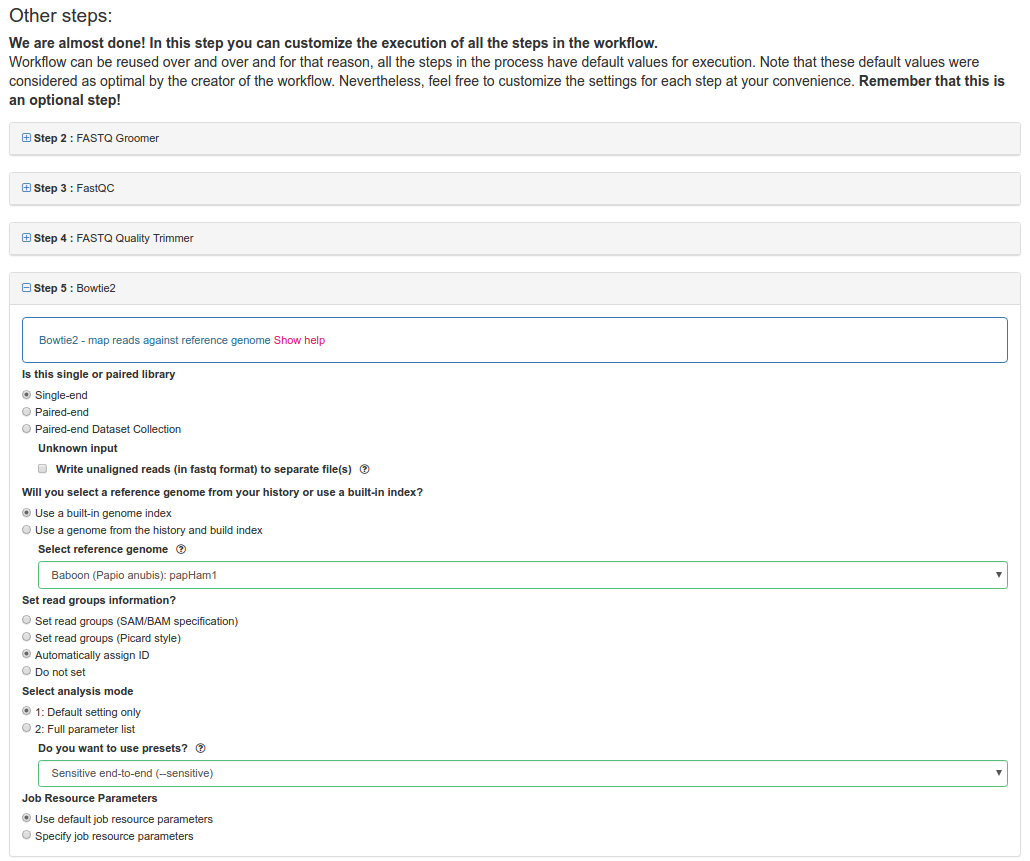
Figure 4. Customizing the execution of the Bowtie2 tool.
Finally, the last step in the process displays an overview of the execution, including the selected input datasets and the custom options for the workflow steps (Figure 5). Now we are ready for launching our workflow!
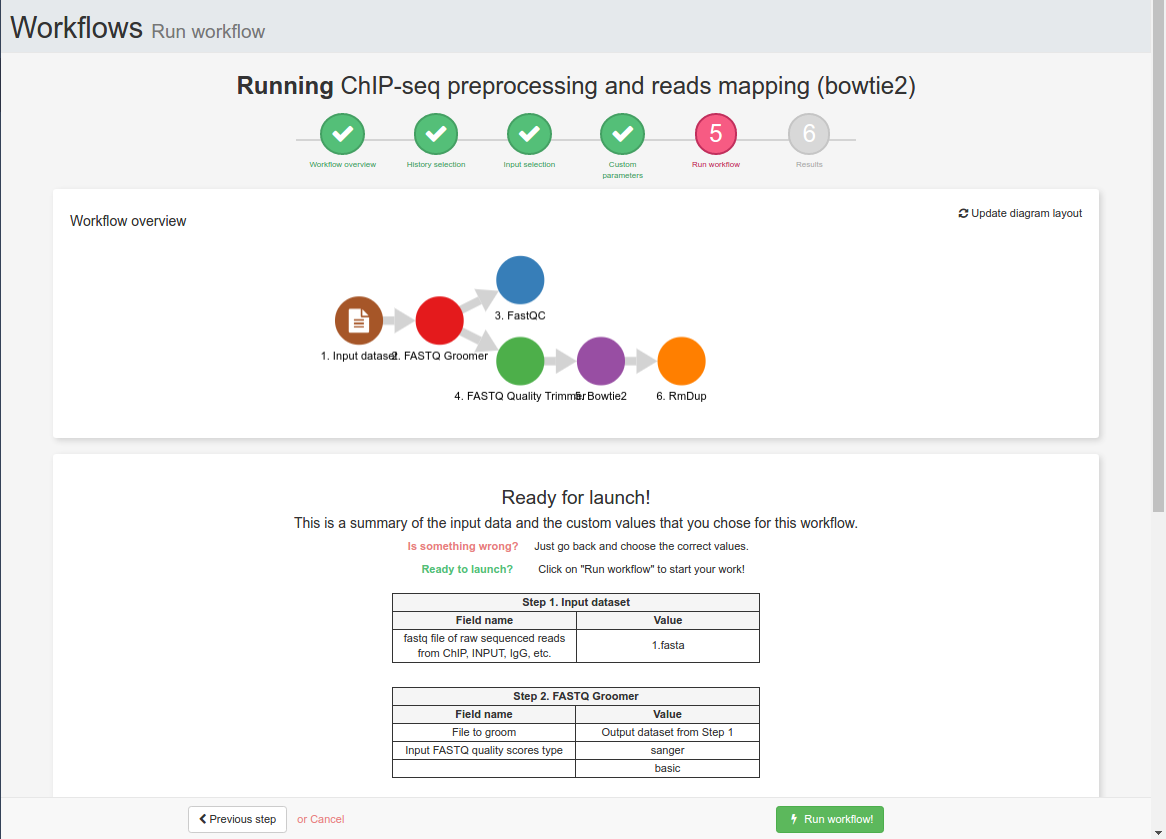
Figure 5. The summary for our workflow execution. Now we are ready for launch!
Using the option "Run workflow" we will notify Galaxy to start a new run of our customized workflow. Usually workflow execution can take a while to finish. Meanwhile, we can keep working on Galaksio as our worflows will be executed in background. Using the top toolbar we can get follow the current state of our executions and recover them as soon as they finish (Figure 6).
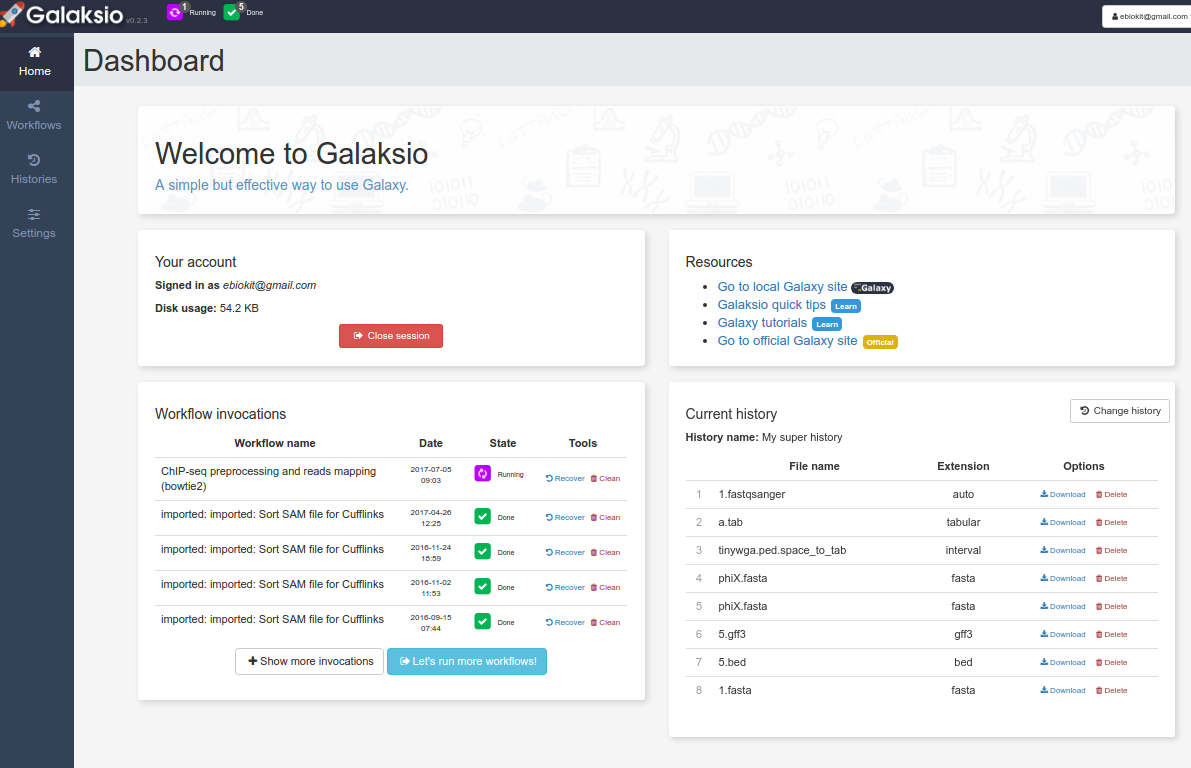
Figure 6. Workflows can be executed in background. In figure, the top bar displays the status for all the worflows (5 done and 1 running). This information is also available at the home panel, at the "Workflow invocations" section.
When our workflow is done, we can recover them and access to the resulting datasets. All the results for our workflow can be downloaded and are stored in our current history.